Instalación del firewall pfSense#
Diagrama de red#
| Diagrama de interfaces de red en VirtualBox |
|---|
 |
| 🟠 Red DMZ - Conexiones que se manejan en la red internal network de VirtualBox |
| 🔵 Red LAN - Conexiones que se manejan en la red host-only de VirtualBox |
| 🟢 Red WAN - Conexiones que se manejan en la red NAT Network de VirtualBox |
| 🔴 Red Externa - Conexiones que salen desde el equipo físico hacia Internet |
Descargar imagen ISO#
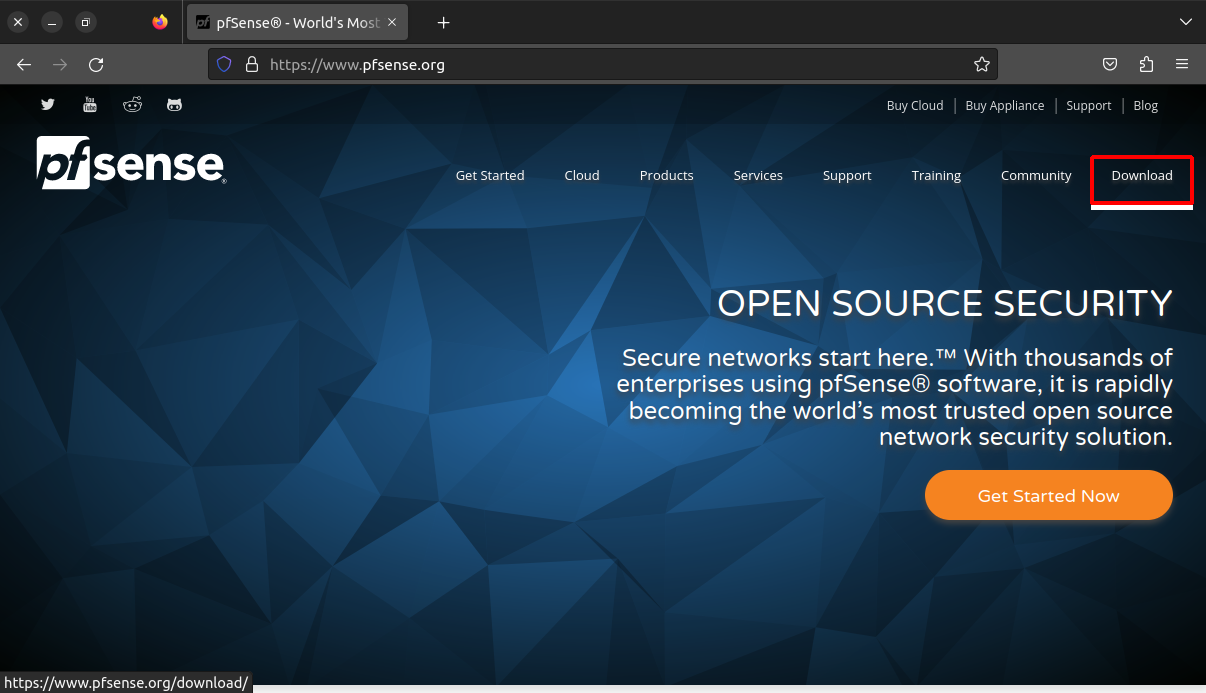
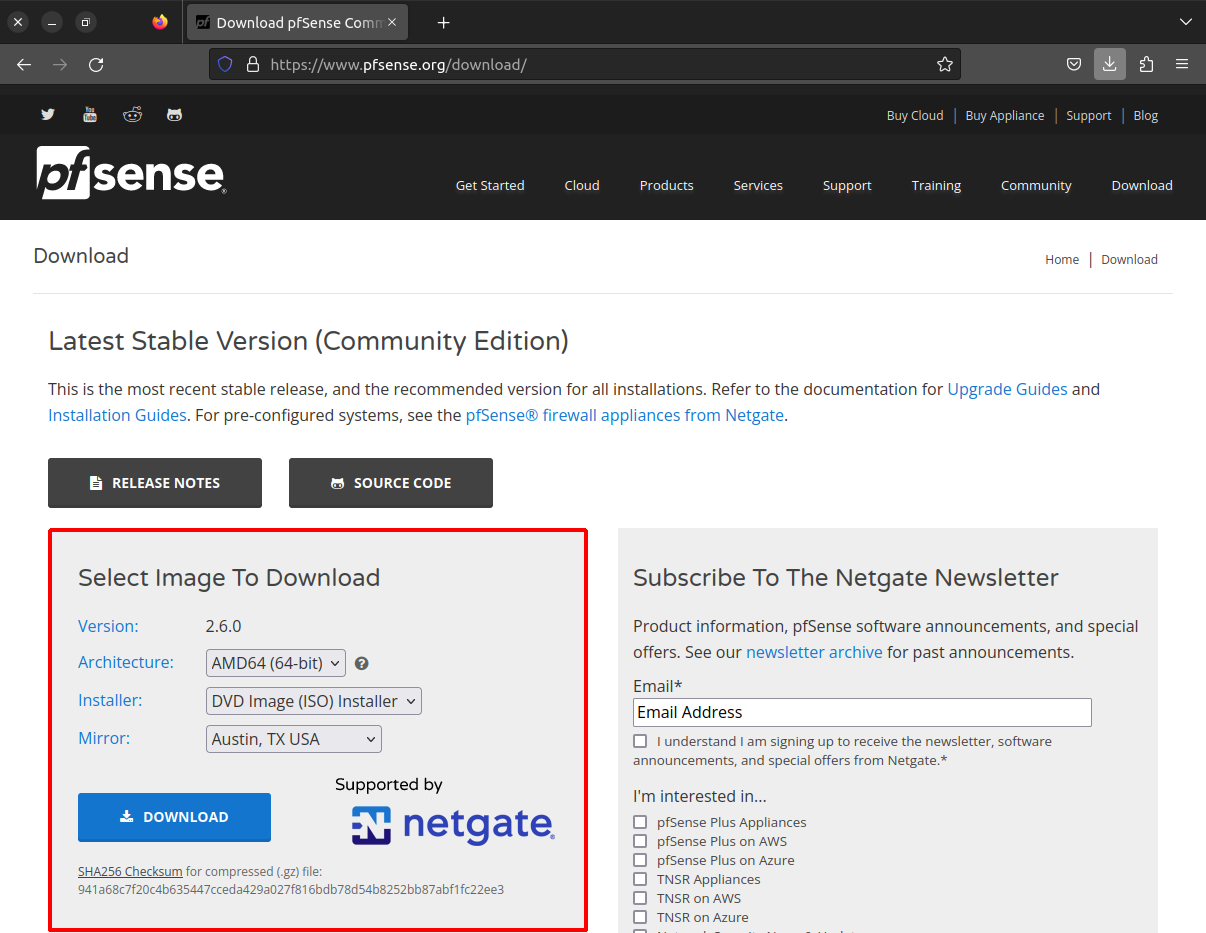
- Descargar el sistema operativo pfSense, estableciendo el parametro DVD Image (ISO) y l arquitectura AMD64, posteriormente descomprimir el archivo
| Descarga del ISO de instalación |
|---|
 |
 |
Crear máquina virtual#
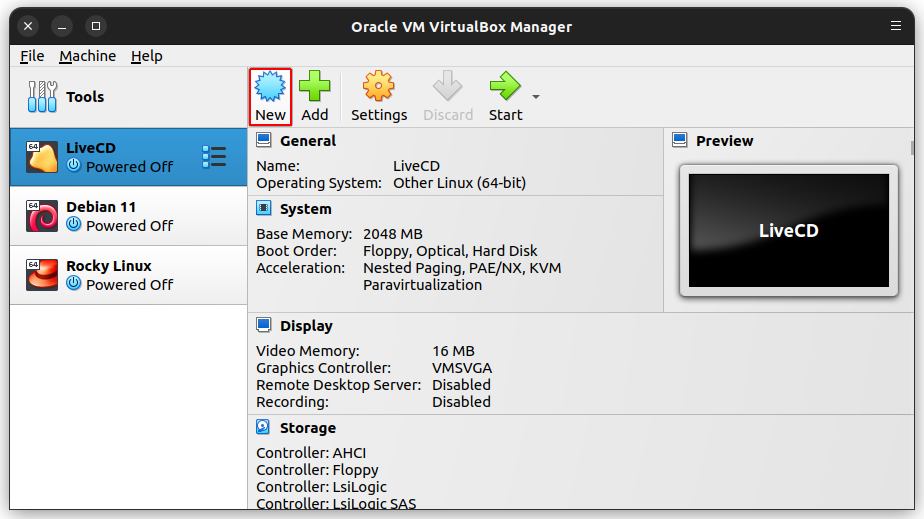
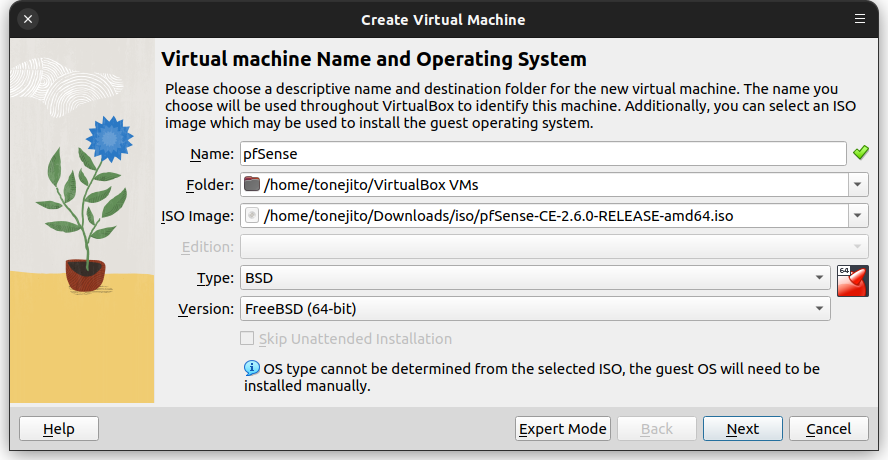
Crear una máquina virtual en Virtualbox con 3 interfaces de red:
Note
- La máquina virtual puede tener solo 512 MB de RAM y 10 GB de disco
| Máquina virtual pfSense |
|---|
 |
 |
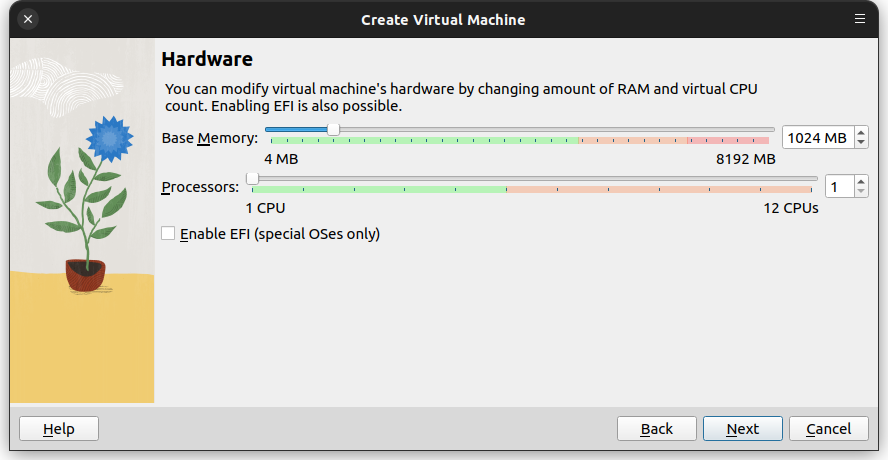 |
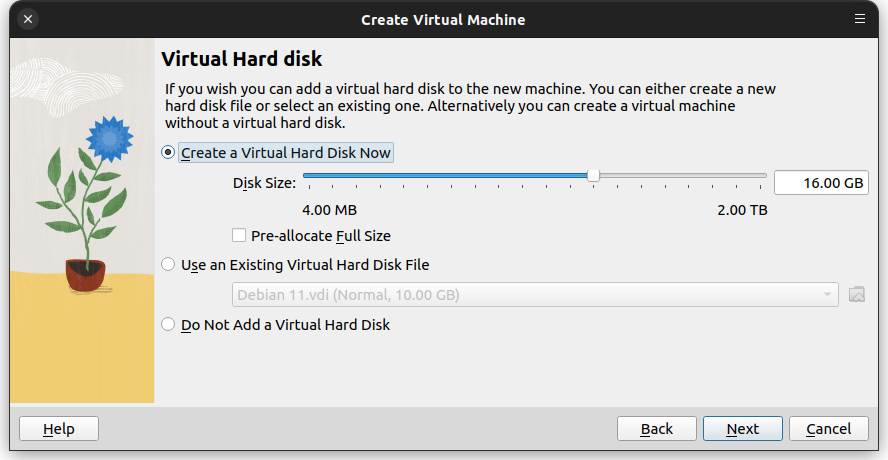 |
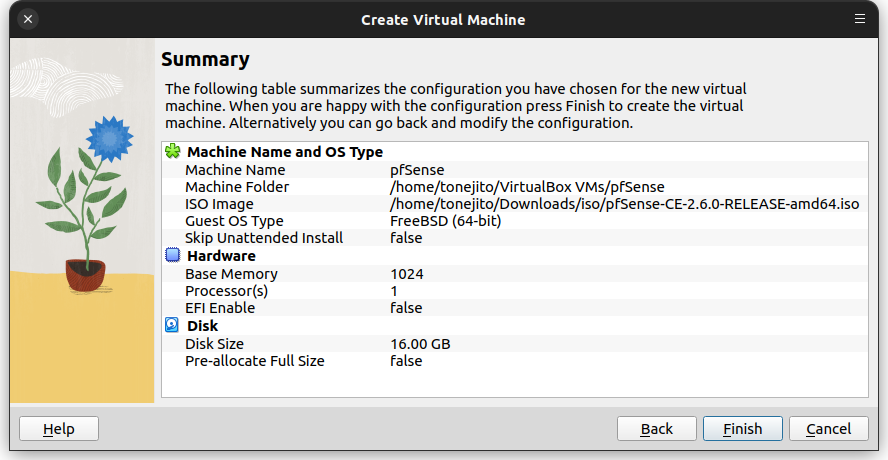 |
Configurar las interfaces de red de la máquina virtual
| # | Habilitado | Red | Tipo | Nombre | Modo promiscuo | Cable conectado |
|---|---|---|---|---|---|---|
| 1 | ☑️ Si | WAN | NAT-Network ¹ |
NatNetwork |
Deshabilitado | ☑️ Si |
| 2 | ☑️ Si | LAN | Host-only ² |
vboxnet0 |
Habilitado | ☑️ Si |
| 3 | ☑️ Si | DMZ | Internal Network ³ |
intnet |
Habilitado | ☑️ Si |
Warning
¹: Crear la redNAT-Networkcon el direccionamiento adecuado²: Configurar la redvboxnet0con el direccionamiento adecuado³: La redintnetse crea al asignarse a la máquina virtual
| Interfaces de red en VirtualBox |
|---|
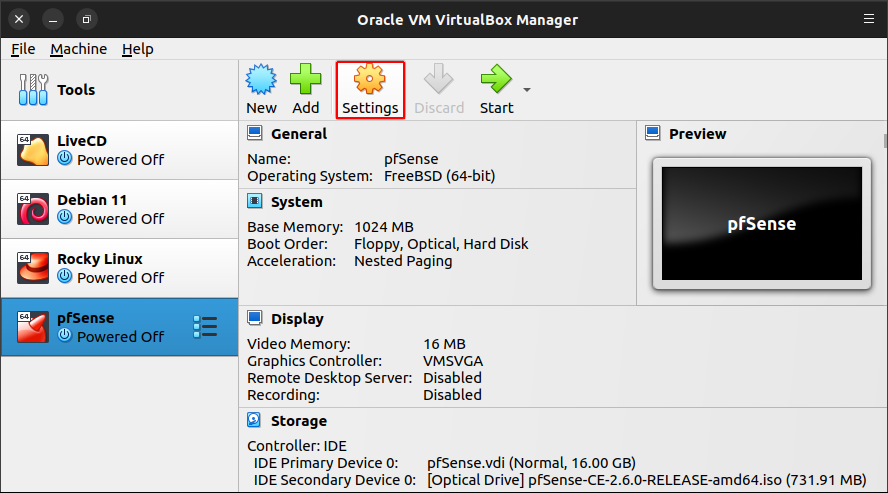 |
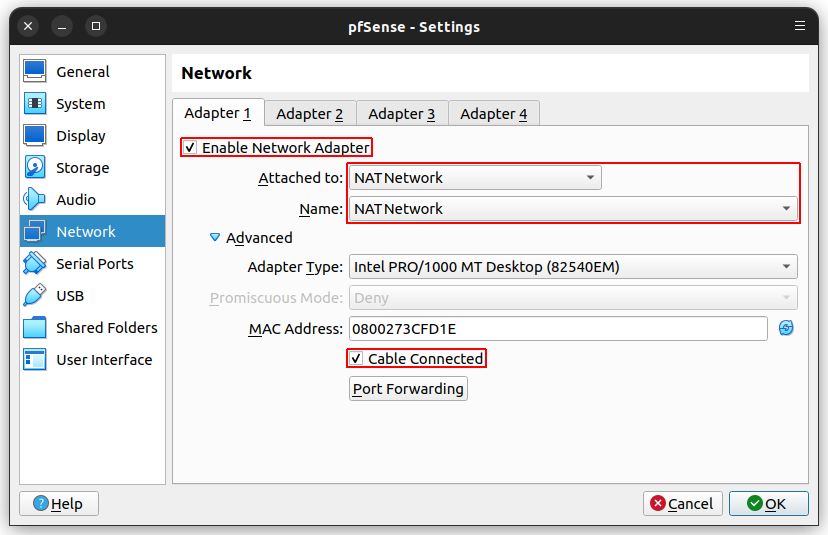 |
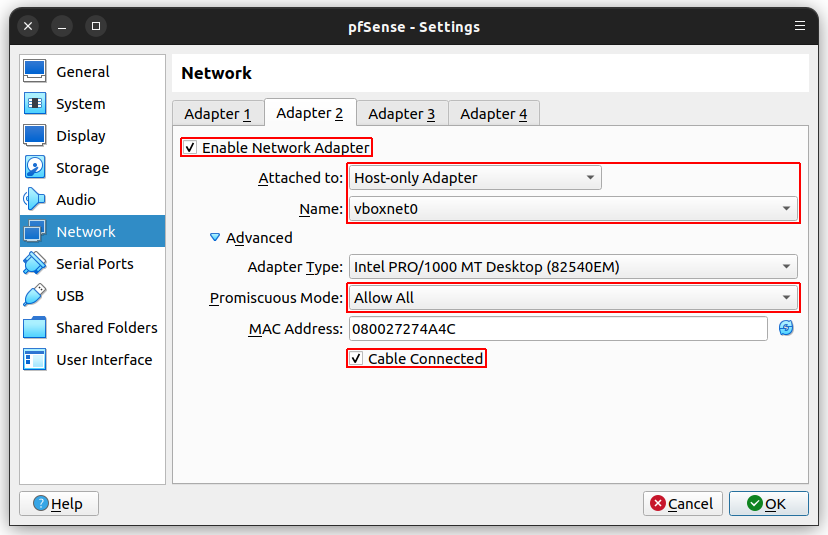 |
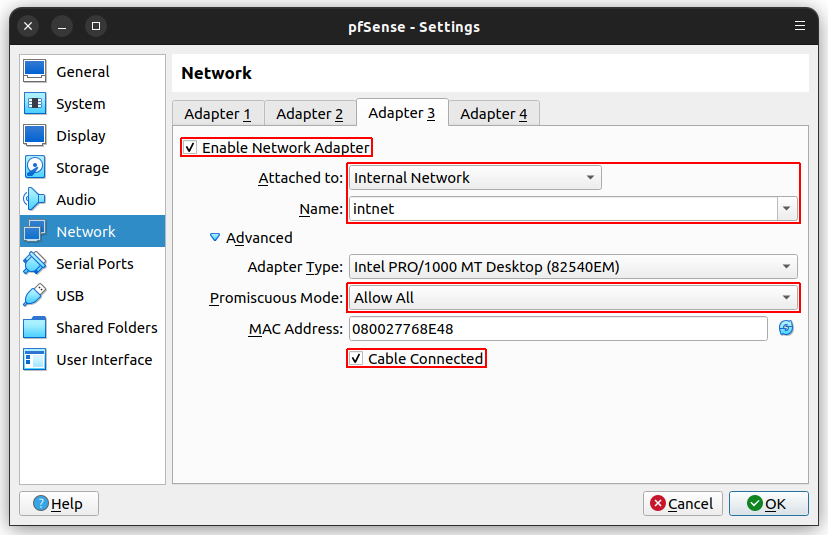 |
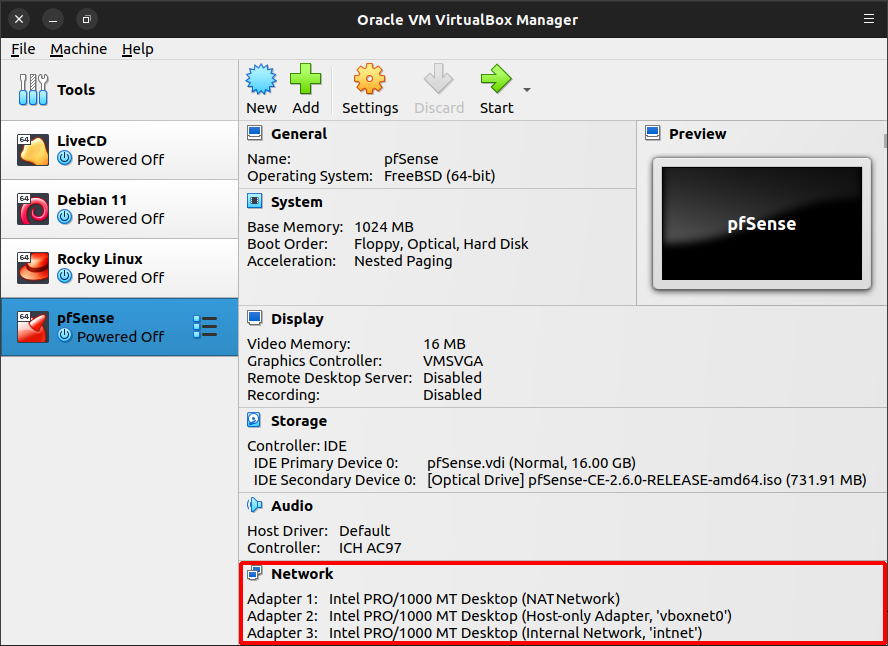 |
- Instalación de pfSense
| Pantallas de instalación
|:------------------------:|
| 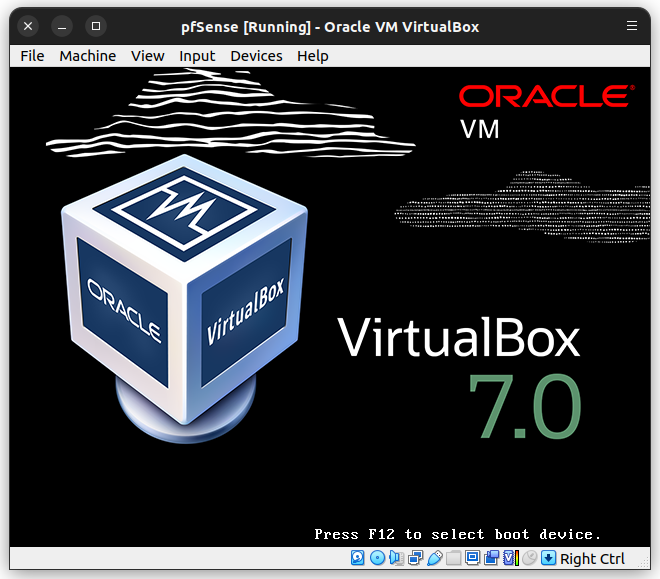
La máquina virtual muestra la pantalla de opciones del cargador de inicio de pfSense.
- Esperar a que se complete el inicio automático (autoboot):
``` - _ __ / | _ _ ___ | ' | |/ __|/ _ ' \/ |/ _ \ | |) | _ / | | __ / | .__/|_| |/_|| |_|/___| |_|
+---------- Welcome to pfSense -----------+ ____
| | / \
| 1. Boot Multi user [Enter] | | /| 2. Boot Single user | | / :-|
| 3. Escape to loader prompt | | _________ ___/ /_ |
| 4. Reboot | | / _ / /_ / |
| 5. Cons: Dual (Serial primary) | | / / / / / / |
| | | / // / / / |
| Options: | | / / / / |
| 6. Kernel: default/kernel (1 of 1) | |/ / / / |
| 7. Boot Options | / // |
| | / |
| | /_______/
+-----------------------------------------+ /
Autoboot in 0 seconds. [Space] to pause ⏳
```
El programa de instalación muestra la pantalla con las notas de copyright de pfSense
- Presionar Accept para continuar
┌────────────────────Copyright and distribution notice───────────────────────┐
 │ Copyright and Trademark Notices.                                           │
 │                                                                            │
 │ Copyright(c) 2004-2016. Electric Sheep Fencing, LLC ("ESF").               │
 │ All Rights Reserved.                                                       │
 │                                                                            │
 │ Copyright(c) 2014-2022. Rubicon Communications, LLC d/b/a Netgate          │
 │ ("Netgate").                                                               │
 │ All Rights Reserved.                                                       │
 │                                                                            │
 │ All logos, text, and content of ESF and/or Netgate, including underlying   │
 │ HTML code, designs, and graphics used and/or depicted herein are           │
 │ protected under United States and international copyright and trademark    │
 │ laws and treaties, and may not be used or reproduced without the prior     │
 │ express written permission of ESF and/or Netgate.                          │
 │                                                                            │
 │ "pfSense" is a registered trademark of ESF, exclusively licensed to        │
 │ Netgate, and may not be used without the prior express written             │
 │ permission of ESF and/or Netgate. All other trademarks shown herein are    │
 │ owned by the respective companies or persons indicated.                    │
 │                                                                            │
 ├───────────────────────────────────────────────────────────────────────28%──┤
 │                                 <Accept>                                   │	⬅️
 └────────────────────────────────────────────────────────────────────────────┘
El instalador muestra una serie de opciones
- Seleccionar Install y presionar OK para continuar
``` pfSense Installer ──────────────────────────────────────────────────────────────────────────────
┌───────────────────────────────Welcome──────────────────────────────────┐
│ Welcome to pfSense! │
│ ┌────────────────────────────────────────────────────────────────────┐ │
│ │██ Install ███████████ Install pfSense ████████████████████████████ │ │ ⬅️
│ │ Rescue Shell Launch a shell for rescue operations │ │
│ │ Recover config.xml Recover config.xml from a previous install │ │
│ └────────────────────────────────────────────────────────────────────┘ │
│ │
│ │
├────────────────────────────────────────────────────────────────────────┤
│ < OK >
```
El instalador muestra la pantalla para seleccionar una distribución de teclado.
- Seleccionar la distribución adecuada, o bien continuar con la opción predeterminada
- Presionar Select para continuar
pfSense Installer
 ──────────────────────────────────────────────────────────────────────────────
      ┌───────────────────────Keymap Selection──────────────────────────┐
      │ The system console driver for pfSense defaults to standard "US" │
      │ keyboard map. Other keymaps can be chosen below.                │
      │ ┌─────────────────────────────────────────────────────────────┐ │
      │ │>>> Continue with default keymap ███████████████████████████ │ │	⬅️
      │ │->- Test default keymap                                      │ │
      │ │( ) Armenian phonetic layout                                 │ │
      │ │( ) Belarusian                                               │ │
      │ │( ) Belgian                                                  │ │
      │ │( ) Belgian (accent keys)                                    │ │
      │ │( ) Brazilian (accent keys)                                  │ │
      │ │( ) Brazilian (without accent keys)                          │ │
      │ │( ) Bulgarian (BDS)                                          │ │
      │ │( ) Bulgarian (Phonetic)                                     │ │
      │ │( ) Canadian Bilingual                                       │ │
      │ └────┴(+)─────────────────────────────────────────────12%─────┘ │
      ├─────────────────────────────────────────────────────────────────┤
      │                   <Select>          <Cancel>                    │	⬅️	Select
      └──────────────────[Press arrows, TAB or ENTER]───────────────────┘
El instalador muestra la pantalla con las opciones de particionado del disco
- Seleccionar Auto (UFS) BIOS para continuar
``` pfSense Installer ──────────────────────────────────────────────────────────────────────────────
 ┌───────────────────────────Partitioning─────────────────────────────┐
 │ How would you like to partition your disk?                         │
 │ ┌────────────────────────────────────────────────────────────────┐ │
 │ │   Auto (ZFS)        Guided Root-on-ZFS                         │ │
 │ │██ Auto (UFS) BIOS █ Guided Disk Setup using BIOS boot method ██│ │	⬅️
 │ │   Auto (UFS) UEFI   Guided Disk Setup using UEFI boot method   │ │
 │ │   Manual            Manual Disk Setup (experts)                │ │
 │ │   Shell             Open a shell and partition by hand         │ │
 │ └────────────────────────────────────────────────────────────────┘ │
 │                                                                    │
 │                                                                    │
 ├────────────────────────────────────────────────────────────────────┤
 │                   <  OK  >           <Cancel>                      │	⬅️	OK
 └────────────────────────────────────────────────────────────────────┘
```
El instalador muestra los discos disponibles para particionar
- Seleccionar el disco
ada0
``` pfSense Installer ──────────────────────────────────────────────────────────────────────────────
        ┌───────────────────Partitioning─────────────────────┐
        │ Select the disk on which to install pfSense        │
        │ ┌────────────────────────────────────────────────┐ │
        │ │██ ada0:  10 GB ATA Hard Disk <VBOX HARDDISK> ██│ │	⬅️
        │ └────────────────────────────────────────────────┘ │
        │                                                    │
        ├────────────────────────────────────────────────────┤
        │            <  OK  >          <Cancel>              │	⬅️	OK
        └────────────────────────────────────────────────────┘
```
El instalador pregunta si se utilizará todo el disco ada0 para la pfSense
- Seleccionar Entire Disk
``` pfSense Installer ──────────────────────────────────────────────────────────────────────────────
              ┌───────────────Partition──────────────────┐
              │ Would you like to use this entire disk   │
              │ (ada0) for pfSense or partition it to    │
              │ share it with other operating systems?   │
              │ Using the entire disk will erase any     │
              │ data currently stored there.             │
              ├──────────────────────────────────────────┤
              │     <Entire Disk>   < Partition >        │	⬅️	Entire Disk
              └──────────────────────────────────────────┘
```
El instalador pide confirmación para borrar el contenido del disco ada0
- Seleccionar Yes
``` pfSense Installer ──────────────────────────────────────────────────────────────────────────────
                     ┌──────Confirmation─────────┐
                     │ This will erase the disk. │
                     │ Are you sure you want to  │
                     │ proceed?                  │
                     ├───────────────────────────┤
                     │     < Yes >   < No  >     │	⬅️	Yes
                     └───────────────────────────┘
```
El instalador pregunta el esquema de particionamiento
- Seleccionar MBR
``` pfSense Installer ──────────────────────────────────────────────────────────────────────────────
              ┌────────────Partition Scheme──────────────┐
              │ Select a partition scheme for this       │
              │ volume:                                  │
              │ ┌──────────────────────────────────────┐ │
              │ │   APM    Apple Partition Map         │ │
              │ │   BSD    BSD Labels                  │ │
              │ │   GPT    GUID Partition Table        │ │
              │ │██ MBR ██ DOS Partitions █████████████│ │	⬅️
              │ │   VTOC8  Sun VTOC8 Partition Table   │ │
              │ └──────────────────────────────────────┘ │
              │                                          │
              │                                          │
              ├──────────────────────────────────────────┤
              │         <  OK  >     <Cancel>            │	⬅️	OK
              └──────────────────────────────────────────┘
Bootable on most x86 systems ```
El instalador muestra las particiones que se van a crear en el disco ada0
- Seleccionar Finish para particionar el disco
``` pfSense Installer ──────────────────────────────────────────────────────────────────────────────
        ┌──────────────────Partition Editor────────────────────┐
        │ Please review the disk setup. When complete, press   │
        │ the Finish button.                                   │
        │┌────────────────────────────────────────────────────┐│
        ││ada0            10 GB   MBR                         ││
        ││  ada0s1        10 GB   BSD                         ││
        ││    ada0s1a     9.5 GB  freebsd-ufs    /            ││
        ││    ada0s1b     512 MB  freebsd-swap   none         ││
        ││                                                    ││
        ││                                                    ││
        ││                                                    ││
        ││                                                    ││
        │└────────────────────────────────────────────────┴(+)┘│
        ├──────────────────────────────────────────────────────┤
        │<Create> <Delete> <Modify> <Revert> < Auto > <Finish> │	⬅️	Finish
        └──────────────────────────────────────────────────────┘
Exit partitioner (will ask whether to save changes) ```
El instalador pide confirmación para hacer los cambios al disco ada0
- Seleccionar Commit
``` pfSense Installer ──────────────────────────────────────────────────────────────────────────────
         ┌──────────────────Confirmation─────────────────────┐
         │ Your changes will now be written to disk. If you  │
         │ have chosen to overwrite existing data, it will   │
         │ be PERMANENTLY ERASED. Are you sure you want to   │
         │ commit your changes?                              │
         ├───────────────────────────────────────────────────┤
         │ <   Commit    > <Revert & Exit> <    Back     >   │	⬅️	Commit
         └───────────────────────────────────────────────────┘
Exit partitioner (will ask whether to save changes) ```
Se revisa la suma de verificación de los archivos de instalación de pfSense
``` pfSense Installer ──────────────────────────────────────────────────────────────────────────────
             ┌──────────Checksum Verification────────────┐
             │                                           │
             │ base.txz                   [In Progress ] │
             │                                           │
             │ Verifying checksums of selected           │
             │ distributions.                            │
             │                                           │
             │  ┌─Overall Progress────────────────────┐  │
             │  │                  0%                 │  │	⏳
             │  └─────────────────────────────────────┘  │
             └───────────────────────────────────────────┘
```
Esperar a que el proceso de instalación de pfSense termine de copiar los archivos al disco
``` pfSense Installer ──────────────────────────────────────────────────────────────────────────────
                  ┌───────Archive Extraction─────────┐
                  │ Extracting distribution files... │
                  │                                  │
                  │                                  │
                  │   Overall Progress:              │
                  │  ┌────────────────────────────┐  │
                  │  │██           10%            │  │	⏳
                  │  └────────────────────────────┘  │
                  └──────────────────────────────────┘
```
El proceso de instalación ha terminado
- Seleccionar Yes para abrir un shell y apagar el equipo
- Esto es necesario para quitar el disco de instalación
``` pfSense Installer ──────────────────────────────────────────────────────────────────────────────
                ┌───────Manual Configuration──────────┐
                │ The installation is now finished.   │
                │ Before exiting the installer, would │
                │ you like to open a shell in the new │
                │ system to make any final manual     │
                │ modifications?                      │
                ├─────────────────────────────────────┤
                │         < Yes >     < No  >         │	⬅️	Yes
                └─────────────────────────────────────┘
```
Ejecutar el comando poweroff para apagar el equipo y finalizar la instalación
``` This shell is operating in a chroot in the new system. When finished making configuration changes, type "exit".
poweroff ⬅️#
2023-03-29T07:58:37.274233+00:00 shutdown 1551 - - power-down by root:
System shutdown time has arrived
Mar 29 07:58:37 syslogd: exiting on signal 15
Waiting (max 60 seconds) for system process vnlru' to stop... done
Waiting (max 60 seconds) for system processsyncer' to stop...
Syncing disks, vnodes remaining... 0 0 0 done
Waiting (max 60 seconds) for system thread bufdaemon' to stop... done
Waiting (max 60 seconds) for system threadbufspacedaemon-0' to stop... done
All buffers synced.
Uptime: 10m11s
acpi0: Powering system off
```
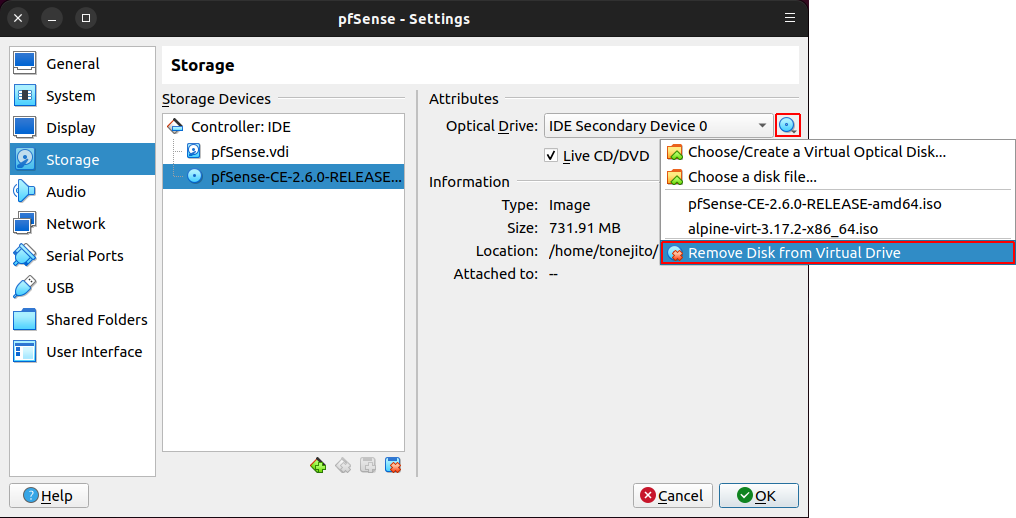
Quitar la imagen ISO de instalación de la unidad de CD/DVD
| Quitar imagen ISO |
|---|
 |
Configuración inicial en modo texto#
- Ingresar a la consola y establecer las direcciones IP de acuerdo a los parámetros indicados a continuación:
| Interfaz | Red | Nombre | Tipo | Dirección IP | DHCP VirtualBox |
|---|---|---|---|---|---|
em0 - Red WAN |
NAT-Network ¹ |
NatNetwork |
DHCP | 10.0.2.Y | Habilitado |
em1 - Red LAN |
Host-Only ² |
vboxnet0 |
Estática | 192.168.42.254 | Deshabilitado |
em2 - Red DMZ |
Internal Network ³ |
intnet |
Estática | 172.16.1.254 | Deshabilitado |
Warning
¹: Crear la redNAT-Networkcon el direccionamiento adecuado²: Configurar la redvboxnet0con el direccionamiento adecuado³: La redintnetse crea al asignarse a la máquina virtual
Esperar a que la máquina virtual inicie para ver el menú de la consola en modo texto de pfSense:
``` FreeBSD/amd64 (pfSense.home.arpa) (ttyu0)
VirtualBox Virtual Machine - Netgate Device ID: 376bf7d400f115685791
Welcome to pfSense 2.6.0-RELEASE (amd64) on pfSense
0) Logout (SSH only) 9) pfTop 1) Assign Interfaces 10) Filter Logs 2) Set interface(s) IP address 11) Restart webConfigurator 3) Reset webConfigurator password 12) PHP shell + pfSense tools 4) Reset to factory defaults 13) Update from console 5) Reboot system 14) Enable Secure Shell (sshd) 6) Halt system 15) Restore recent configuration 7) Ping host 16) Restart PHP-FPM 8) Shell
Enter an option: ```
Asignar interfaces de red#
Seleccionar la opción 1 para asignar las interaces a la red correspondiente:
``` VirtualBox Virtual Machine - Netgate Device ID: 376bf7d400f115685791
Welcome to pfSense 2.6.0-RELEASE (amd64) on pfSense
0) Logout (SSH only) 9) pfTop 1) Assign Interfaces 🔆 10) Filter Logs 2) Set interface(s) IP address 11) Restart webConfigurator 3) Reset webConfigurator password 12) PHP shell + pfSense tools 4) Reset to factory defaults 13) Update from console 5) Reboot system 14) Enable Secure Shell (sshd) 6) Halt system 15) Restore recent configuration 7) Ping host 16) Restart PHP-FPM 8) Shell
Enter an option: 1 ⬅️ ```
Se muestran los nombres y direcciones MAC de las interfaces de red para ayudar a identificarlas:
``` Valid interfaces are:
em0 08:00:27:3c:fd:1e (up) Intel(R) Legacy PRO/1000 MT 82540EM 🟢 em1 08:00:27:27:4a:4c (up) Intel(R) Legacy PRO/1000 MT 82540EM 🔵 em2 08:00:27:76:8e:48 (down) Intel(R) Legacy PRO/1000 MT 82540EM 🟠 ```
La interfaz de configuración pregunta si se deben configurar vLANs para encapsulamiento de paquetes.
- Seleccionar la opción
nporque esto no es requerido en esta actividad:
``` Do VLANs need to be set up first? If VLANs will not be used, or only for optional interfaces, it is typical to say no here and use the webConfigurator to configure VLANs later, if required.
Should VLANs be set up now [y|n]? n ⬅️ ```
La interfaz muestra un mensaje sobre la auto-detección de las interfaces de red.
- Ignorar este mensaje porque esta actividad requiere que se asignen manualmente las interfaces:
If the names of the interfaces are not known, auto-detection can
be used instead. To use auto-detection, please disconnect all
interfaces before pressing 'a' to begin the process.
Asignar la interfaz em0 a la red WAN:
Enter the WAN interface name or 'a' for auto-detection
(em0 em1 em2 or a):	em0	⬅️
Asignar la interfaz em1 a la red LAN:
Enter the LAN interface name or 'a' for auto-detection
NOTE: this enables full Firewalling/NAT mode.
(em1 em2 a or nothing if finished):	em1	⬅️
Asignar la interfaz em2 a la red OPT1:
Optional interface 1 description found: OPT1
Enter the Optional 1 interface name or 'a' for auto-detection
(em2 a or nothing if finished):	em2	⬅️
La interfaz muestra la asignación de interfaces a las redes correspondientes.
- Seleccionar la opción
ypara confirmar los cambios:
``` The interfaces will be assigned as follows:
🟢 WAN -> em0 🔵 LAN -> em1 🟠 OPT1 -> em2
Do you want to proceed [y|n]? y ⬅️
Writing configuration...done. One moment while the settings are reloading... done! ```
Asignar direcciones IP#
Configurar interfaz WAN 🟢#
Seleccionar la opción 2 en la interfaz de configuración de modo texto de pfSense:
``` VirtualBox Virtual Machine - Netgate Device ID: 376bf7d400f115685791
Welcome to pfSense 2.6.0-RELEASE (amd64) on pfSense
🟢 WAN (wan) -> em0 -> v4/DHCP4: 10.0.2.15/24 ✅ 🔵 LAN (lan) -> em1 -> v4: 192.168.1.1/24 ❌ 🟠 OPT1 (opt1) -> em2 -> ❗
0) Logout (SSH only) 9) pfTop 1) Assign Interfaces 10) Filter Logs 2) Set interface(s) IP address 🔆 11) Restart webConfigurator 3) Reset webConfigurator password 12) PHP shell + pfSense tools 4) Reset to factory defaults 13) Update from console 5) Reboot system 14) Disable Secure Shell (sshd) 6) Halt system 15) Restore recent configuration 7) Ping host 16) Restart PHP-FPM 8) Shell
Enter an option: 2 ⬅️ ```
La interfaz muestra la asignación actual de interfaces, redes y configuración IP.
- Seleccionar la opción
1para configurar la interfaz WAN:
``` Available interfaces:
1 - WAN (em0 - dhcp, dhcp6) 🔆 2 - LAN (em1 - static) 3 - OPT1 (em2)
Enter the number of the interface you wish to configure: 1 ⬅️ ```
Seleccionar las opciones para configurar la interfaz WAN via DHCP:
``` Configure IPv4 address WAN interface via DHCP? (y/n) y ⬅️
Configure IPv6 address WAN interface via DHCP6? (y/n) y ⬅️ Disabling IPv4 DHCPD... Disabling IPv6 DHCPD... ```
Seleccionar la opción n para dejar la interfaz de configuración web en HTTPS:
Do you want to revert to HTTP as the webConfigurator protocol? (y/n) n ⬅️
Esperar a que se apliquen los cambios:
``` Please wait while the changes are saved to WAN... Reloading filter... Reloading routing configuration... DHCPD...
The IPv4 WAN address has been set to dhcp ✅
The IPv6 WAN address has been set to dhcp6 ✅
Press
Configurar interfaz LAN 🔵#
Seleccionar la opción 2 en la interfaz de configuración de modo texto de pfSense:
``` VirtualBox Virtual Machine - Netgate Device ID: 376bf7d400f115685791
Welcome to pfSense 2.6.0-RELEASE (amd64) on pfSense
🟢 WAN (wan) -> em0 -> v4/DHCP4: 10.0.2.15/24 ✅ 🔵 LAN (lan) -> em1 -> v4: 192.168.1.1/24 ❌ 🟠 OPT1 (opt1) -> em2 -> ❗
0) Logout (SSH only) 9) pfTop 1) Assign Interfaces 10) Filter Logs 2) Set interface(s) IP address 🔆 11) Restart webConfigurator 3) Reset webConfigurator password 12) PHP shell + pfSense tools 4) Reset to factory defaults 13) Update from console 5) Reboot system 14) Disable Secure Shell (sshd) 6) Halt system 15) Restore recent configuration 7) Ping host 16) Restart PHP-FPM 8) Shell
Enter an option: 2 ⬅️ ```
La interfaz muestra la asignación actual de interfaces, redes y configuración IP.
- Seleccionar la opción
2para configurar la interfaz LAN:
``` Available interfaces:
1 - WAN (em0 - dhcp, dhcp6) 2 - LAN (em1 - static) 🔆 3 - OPT1 (em2)
Enter the number of the interface you wish to configure: 2 ⬅️ ```
Introducir la configuración IP de la interfaz LAN:
| Elemento | Valor |
|---|---|
| Dirección IP | 192.168.42.254 |
| Máscara de subred | 255.255.255.0 (24 bits) |
| Gateway IPv4 | (ninguno) |
| Configuración IPv6 | (ninguna) |
```
Enter the new LAN IPv4 address. Press
192.168.42.254 ⬅️
Subnet masks are entered as bit counts (as in CIDR notation) in pfSense. e.g. 255.255.255.0 = 24 🔆 255.255.0.0 = 16 255.0.0.0 = 8
Enter the new LAN IPv4 subnet bit count (1 to 32):
24 ⬅️
For a WAN, enter the new LAN IPv4 upstream gateway address.
For a LAN, press
⬅️
Enter the new LAN IPv6 address. Press
⬅️ ```
Seleccionar la opción y para activar el servidor DHCP en la red LAN y proporcionar los rangos de inicio y fin de asignación DHCP:
| Elemento | Valor |
|---|---|
| Dirección inicial DHCP | 192.168.42.100 |
| Dirección final DHCP | 192.168.42.199 |
Do you want to enable the DHCP server on LAN? (y/n)	y	⬅️
Enter the start address of the IPv4 client address range:	192.168.42.100	⬅️
Enter the end address of the IPv4 client address range:		192.168.42.199	⬅️
Disabling IPv6 DHCPD...
Seleccionar la opción n para dejar la interfaz de configuración web en HTTPS:
Do you want to revert to HTTP as the webConfigurator protocol? (y/n) n ⬅️
Esperar a que se apliquen los cambios. Se muestra la dirección IP configurada en la interfaz LAN y la URL HTTPS de la interfaz de configuración web que escucha en la red LAN:
``` Please wait while the changes are saved to LAN... Reloading filter... Reloading routing configuration... DHCPD...
The IPv4 LAN address has been set to 192.168.42.254/24 ✅ You can now access the webConfigurator by opening the following URL in your web browser: https://192.168.42.254/ ✅
Press
Configurar interfaz OPT 🟠#
Seleccionar la opción 2 en la interfaz de configuración de modo texto de pfSense:
``` VirtualBox Virtual Machine - Netgate Device ID: 376bf7d400f115685791
Welcome to pfSense 2.6.0-RELEASE (amd64) on pfSense
🟢 WAN (wan) -> em0 -> v4/DHCP4: 10.0.2.15/24 ✅ 🔵 LAN (lan) -> em1 -> v4: 192.168.42.254/24 ✅ 🟠 OPT1 (opt1) -> em2 -> ❗
0) Logout (SSH only) 9) pfTop 1) Assign Interfaces 10) Filter Logs 2) Set interface(s) IP address 🔆 11) Restart webConfigurator 3) Reset webConfigurator password 12) PHP shell + pfSense tools 4) Reset to factory defaults 13) Update from console 5) Reboot system 14) Disable Secure Shell (sshd) 6) Halt system 15) Restore recent configuration 7) Ping host 16) Restart PHP-FPM 8) Shell
Enter an option: 2 ⬅️ ```
La interfaz muestra la asignación actual de interfaces, redes y configuración IP.
- Seleccionar la opción
3para configurar la interfaz OPT:
``` Available interfaces:
1 - WAN (em0 - dhcp, dhcp6) 2 - LAN (em1 - static) 3 - OPT1 (em2) 🔆
Enter the number of the interface you wish to configure: 3 ⬅️ ```
Introducir la configuración IP de la interfaz OPT:
| Elemento | Valor |
|---|---|
| Dirección IP | 172.16.1.254 |
| Máscara de subred | 255.255.255.0 (24 bits) |
| Gateway IPv4 | (ninguno) |
| Configuración IPv6 | (ninguna) |
```
Enter the new OPT1 IPv4 address. Press
172.16.1.254 ⬅️
Subnet masks are entered as bit counts (as in CIDR notation) in pfSense. e.g. 255.255.255.0 = 24 🔆 255.255.0.0 = 16 255.0.0.0 = 8
Enter the new OPT1 IPv4 subnet bit count (1 to 32):
24 ⬅️
For a WAN, enter the new OPT1 IPv4 upstream gateway address.
For a LAN, press
⬅️
Enter the new OPT1 IPv6 address. Press
⬅️ ```
Seleccionar la opción n para desactivar el servidor DHCP en la red OPT:
Do you want to enable the DHCP server on OPT1? (y/n)	n	⬅️
Disabling IPv4 DHCPD...
Disabling IPv6 DHCPD...
Seleccionar la opción n para dejar la interfaz de configuración web en HTTPS:
Do you want to revert to HTTP as the webConfigurator protocol? (y/n) n ⬅️
Esperar a que se apliquen los cambios. Se muestra la dirección IP configurada en la interfaz OPT:
``` Please wait while the changes are saved to OPT1... Reloading filter... Reloading routing configuration... DHCPD...
The IPv4 OPT1 address has been set to 172.16.1.254/24 ✅
Press
Habilitar el servicio de SSH#
Seleccionar la opción 2 en la interfaz de configuración de modo texto de pfSense para habilitar el servicio de SSH:
``` VirtualBox Virtual Machine - Netgate Device ID: 376bf7d400f115685791
Welcome to pfSense 2.6.0-RELEASE (amd64) on pfSense
🟢 WAN (wan) -> em0 -> v4/DHCP4: 10.0.2.15/24 ✅ 🔵 LAN (lan) -> em1 -> v4: 192.168.42.254/24 ✅ 🟠 OPT1 (opt1) -> em2 -> v4: 172.16.1.254/24 ✅
0) Logout (SSH only) 9) pfTop 1) Assign Interfaces 10) Filter Logs 2) Set interface(s) IP address 11) Restart webConfigurator 3) Reset webConfigurator password 12) PHP shell + pfSense tools 4) Reset to factory defaults 13) Update from console 5) Reboot system 14) Enable Secure Shell (sshd) 🔆 6) Halt system 15) Restore recent configuration 7) Ping host 16) Restart PHP-FPM 8) Shell
Enter an option: 14 ⬅️ ```
Confirmar que se habilitará el servicio de SSH y esperar a que se apliquen los cambios:
``` SSHD is currently disabled. Would you like to enable? [y/n]? y ⬅️
Writing configuration... done.
Enabling SSHD... Reloading firewall rules. done. ```
Verificar la conectividad a Internet#
Conectividad a Internet utilizando una dirección IP#
Seleccionar la opción 7 para hacer PING a un equipo en Internet:
``` VirtualBox Virtual Machine - Netgate Device ID: 376bf7d400f115685791
Welcome to pfSense 2.6.0-RELEASE (amd64) on pfSense
🟢 WAN (wan) -> em0 -> v4/DHCP4: 10.0.2.15/24 ✅ 🔵 LAN (lan) -> em1 -> v4: 192.168.42.254/24 ✅ 🟠 OPT1 (opt1) -> em2 -> v4: 172.16.1.254/24 ✅
0) Logout (SSH only) 9) pfTop 1) Assign Interfaces 10) Filter Logs 2) Set interface(s) IP address 11) Restart webConfigurator 3) Reset webConfigurator password 12) PHP shell + pfSense tools 4) Reset to factory defaults 13) Update from console 5) Reboot system 14) Disable Secure Shell (sshd) 6) Halt system 15) Restore recent configuration 7) Ping host 🔆 16) Restart PHP-FPM 8) Shell
Enter an option: 7 ⬅️ ```
Introducir una dirección IP homologada como 1.1.1.1 y esperar a que se muestren los resultados:
``` Enter a host name or IP address: 1.1.1.1
PING 1.1.1.1 (1.1.1.1): 56 data bytes 64 bytes from 1.1.1.1: icmp_seq=0 ttl=63 time=8.899 ms 64 bytes from 1.1.1.1: icmp_seq=1 ttl=63 time=8.538 ms 64 bytes from 1.1.1.1: icmp_seq=2 ttl=63 time=8.618 ms
--- 1.1.1.1 ping statistics --- 3 packets transmitted, 3 packets received, 0.0% packet loss round-trip min/avg/max/stddev = 8.538/8.685/8.899/0.155 ms
Press ENTER to continue. ⬅️ ```
Conectividad utilizando un nombre de dominio#
Seleccionar la opción 7 para hacer PING a un equipo en Internet:
``` VirtualBox Virtual Machine - Netgate Device ID: 376bf7d400f115685791
Welcome to pfSense 2.6.0-RELEASE (amd64) on pfSense
🟢 WAN (wan) -> em0 -> v4/DHCP4: 10.0.2.15/24 ✅ 🔵 LAN (lan) -> em1 -> v4: 192.168.42.254/24 ✅ 🟠 OPT1 (opt1) -> em2 -> v4: 172.16.1.254/24 ✅
0) Logout (SSH only) 9) pfTop 1) Assign Interfaces 10) Filter Logs 2) Set interface(s) IP address 11) Restart webConfigurator 3) Reset webConfigurator password 12) PHP shell + pfSense tools 4) Reset to factory defaults 13) Update from console 5) Reboot system 14) Disable Secure Shell (sshd) 6) Halt system 15) Restore recent configuration 7) Ping host 🔆 16) Restart PHP-FPM 8) Shell
Enter an option: 7 ⬅️ ```
Introducir un nombre de dominio conocido como example.com y esperar a que se muestren los resultados:
``` Enter a host name or IP address: example.com
PING example.com (93.184.216.34): 56 data bytes 64 bytes from 93.184.216.34: icmp_seq=0 ttl=63 time=14.779 ms 64 bytes from 93.184.216.34: icmp_seq=1 ttl=63 time=17.551 ms 64 bytes from 93.184.216.34: icmp_seq=2 ttl=63 time=16.415 ms
--- example.com ping statistics --- 3 packets transmitted, 3 packets received, 0.0% packet loss round-trip min/avg/max/stddev = 14.779/16.248/17.551/1.137 ms
Press ENTER to continue. ⬅️ ```
Configuraciónde inicial con la interfaz web#
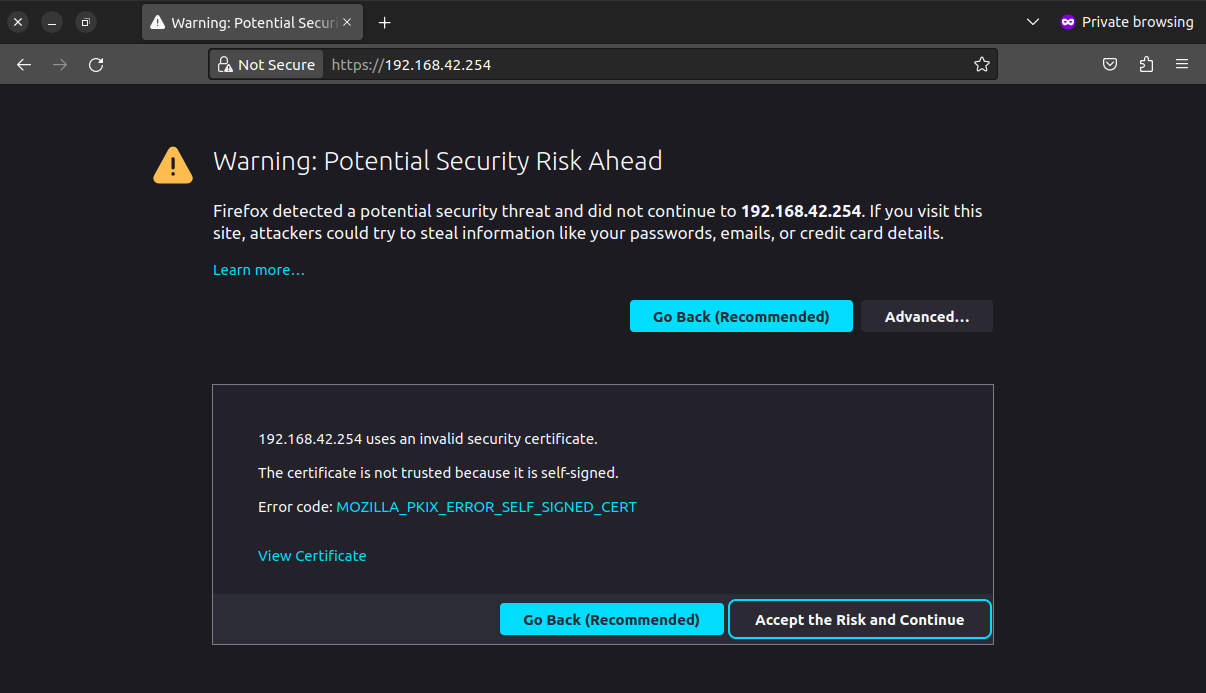
Ingresar a la interfaz web de pfSense conectandose a la dirección IP de interfaz LAN mediante HTTPS:
| Interfaz web de pfSense |
|---|
 |
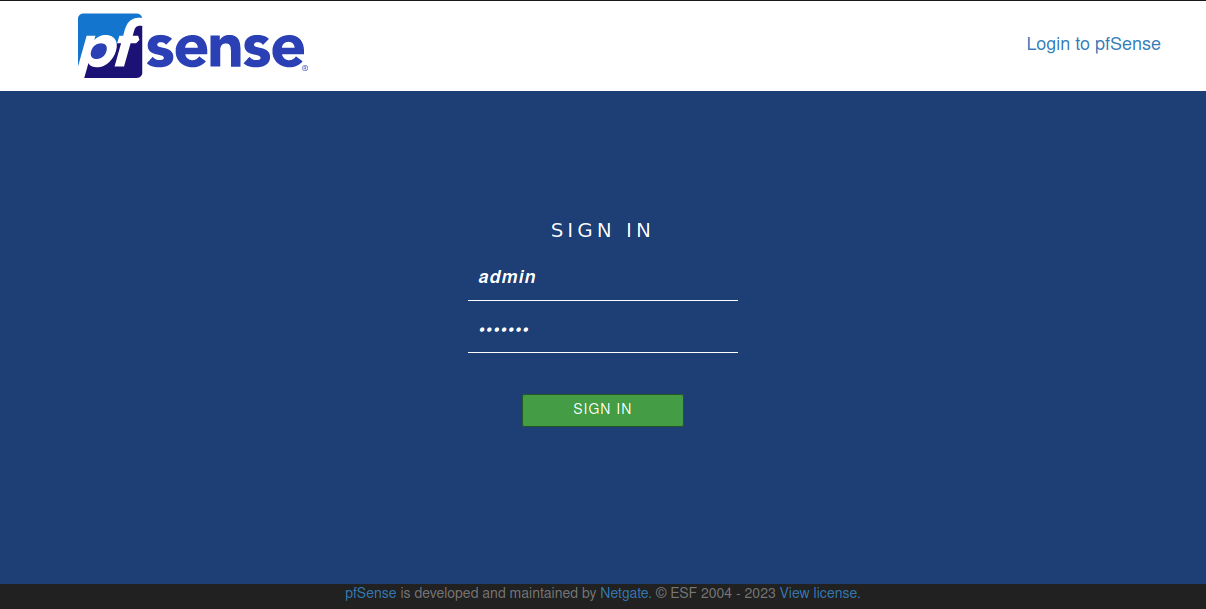
Iniciar sesión con las credenciales predeterminadas
| Elemento | Valor |
|---|---|
| Usuario | admin |
| Contraseña | pfsense |
| Inicio de sesión de pfSense |
|---|
 |
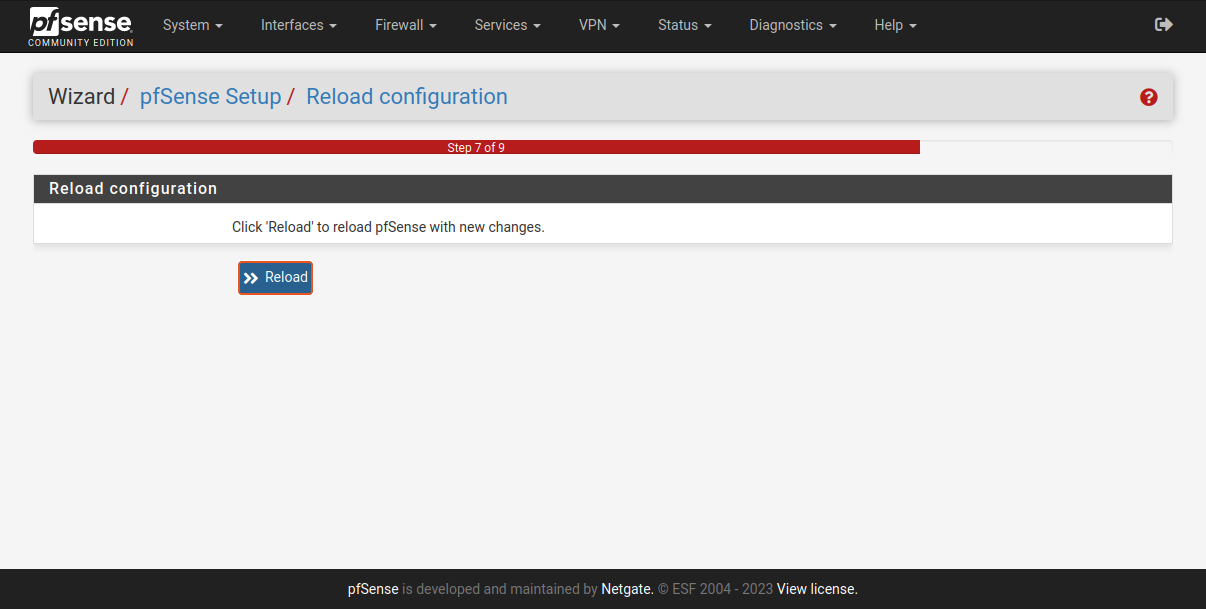
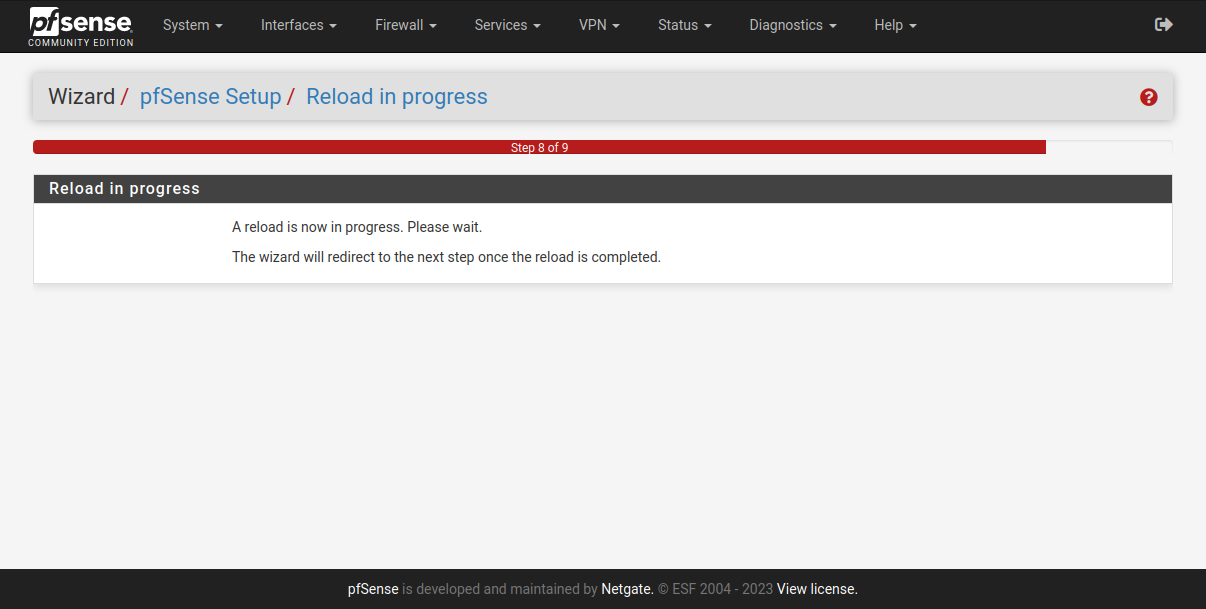
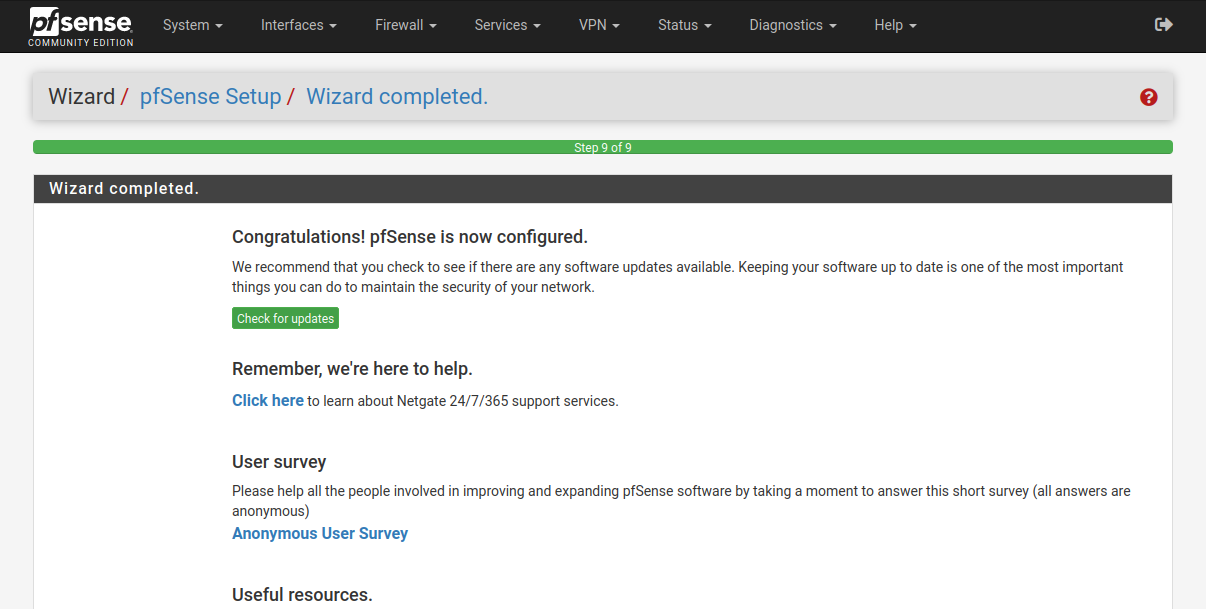
Asistente de inicio#
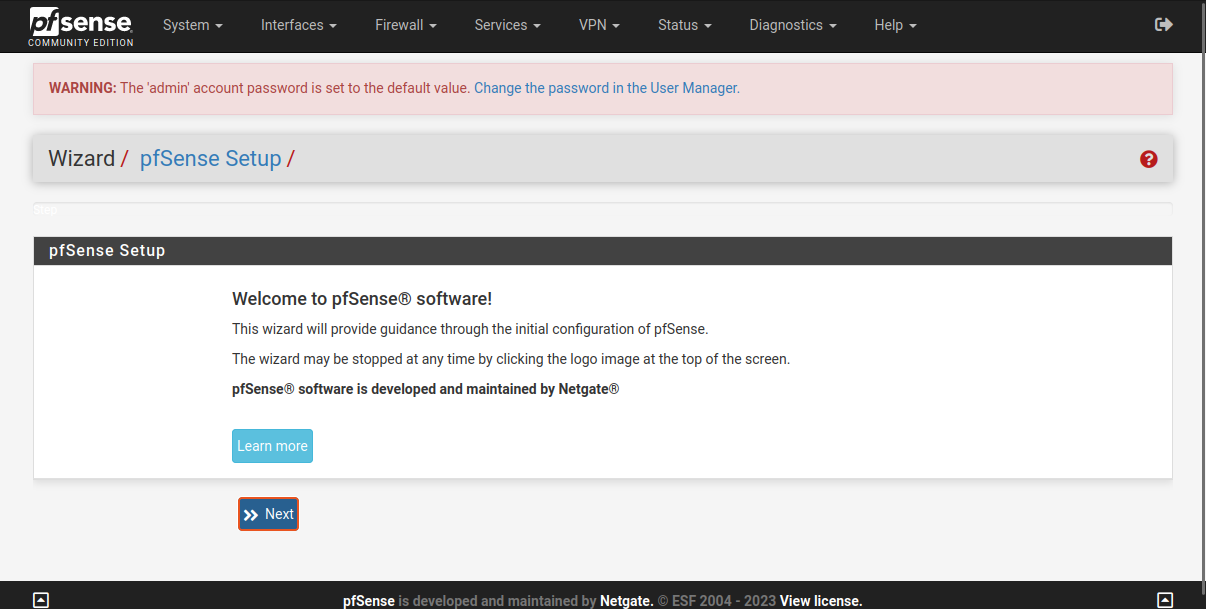
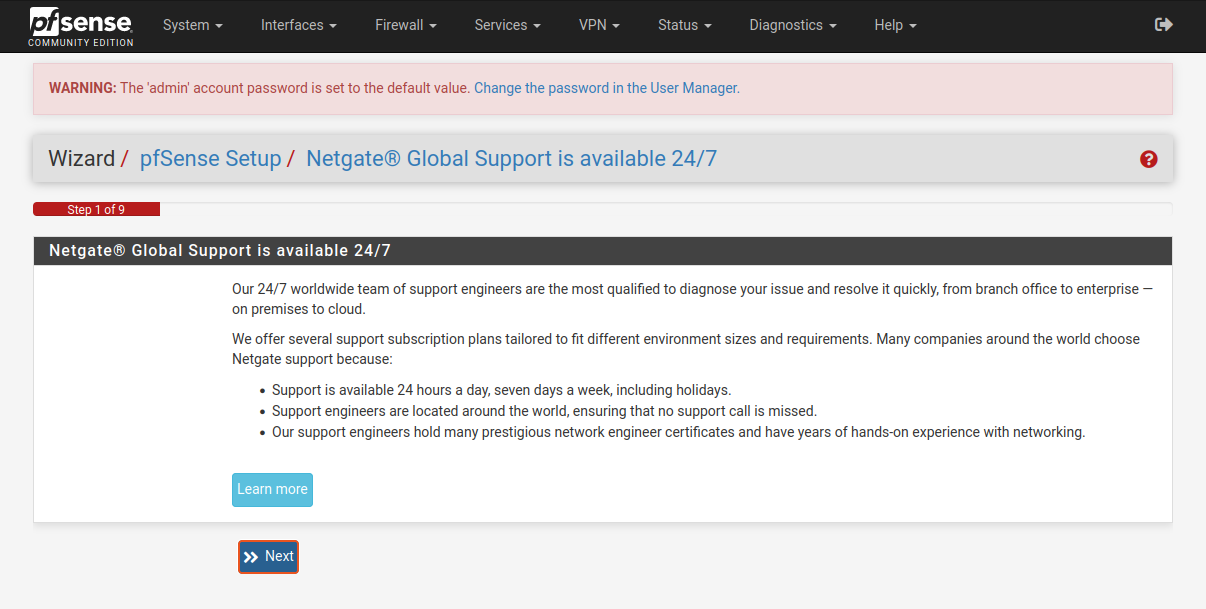
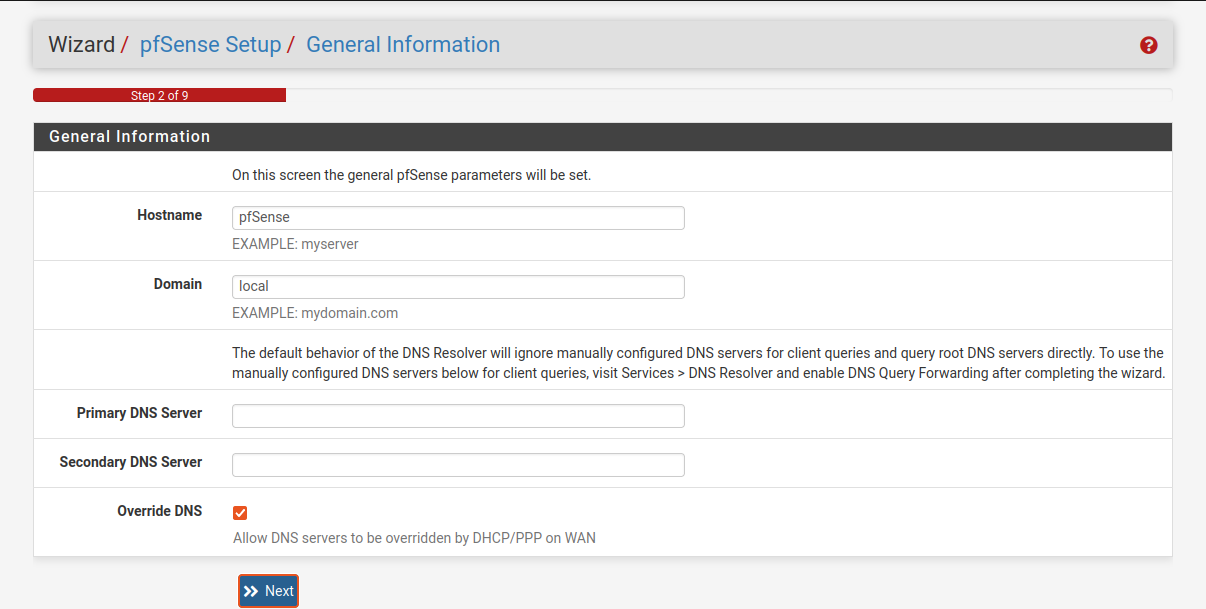
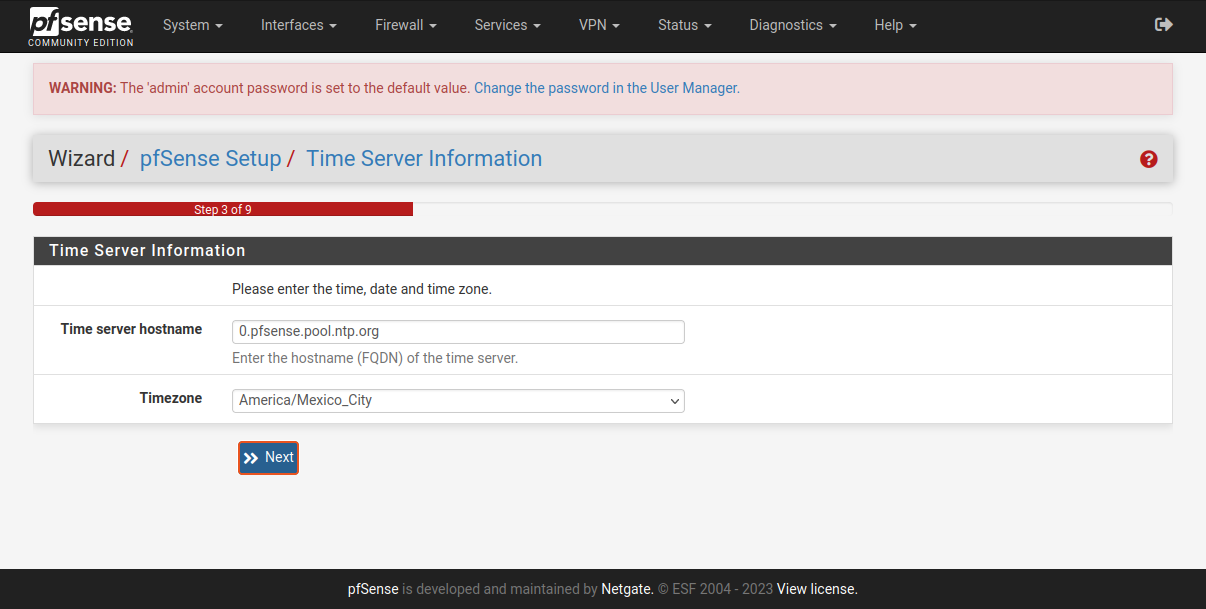
Se presenta el mensaje de inicio
Danger
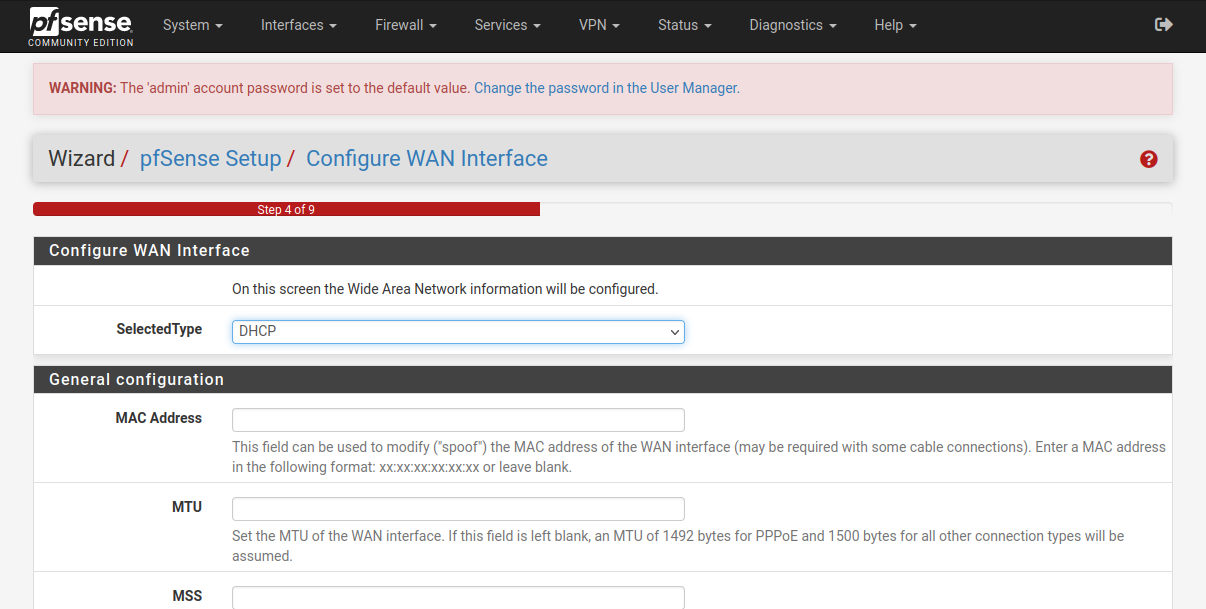
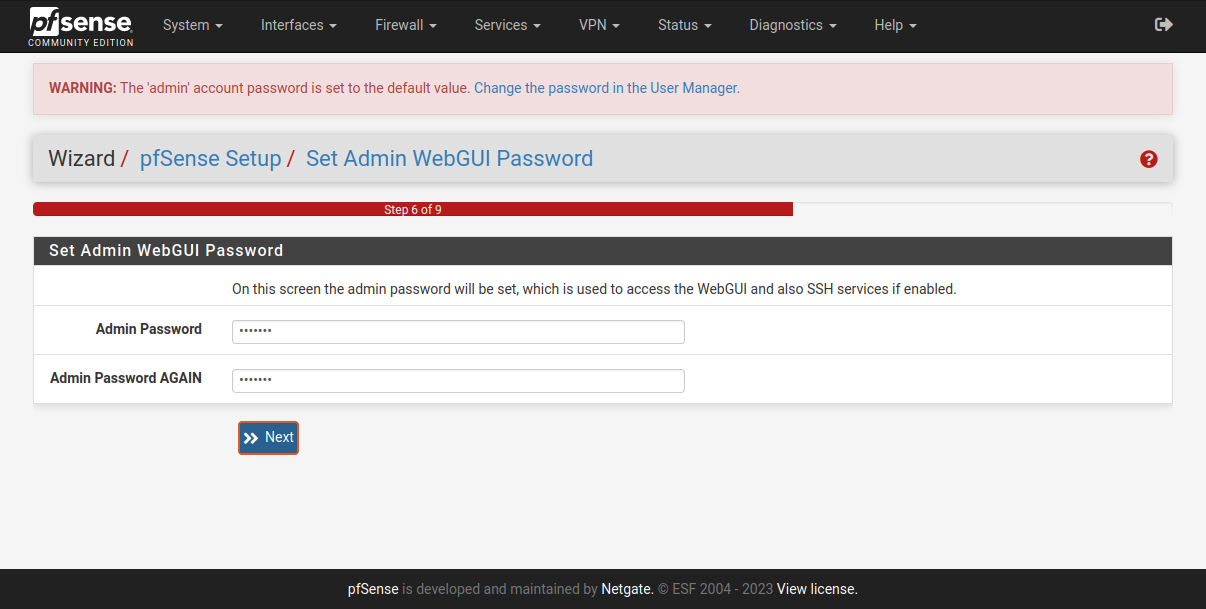
- Establecer la contraseña de administrador de pfSense como
Redes-2026-2
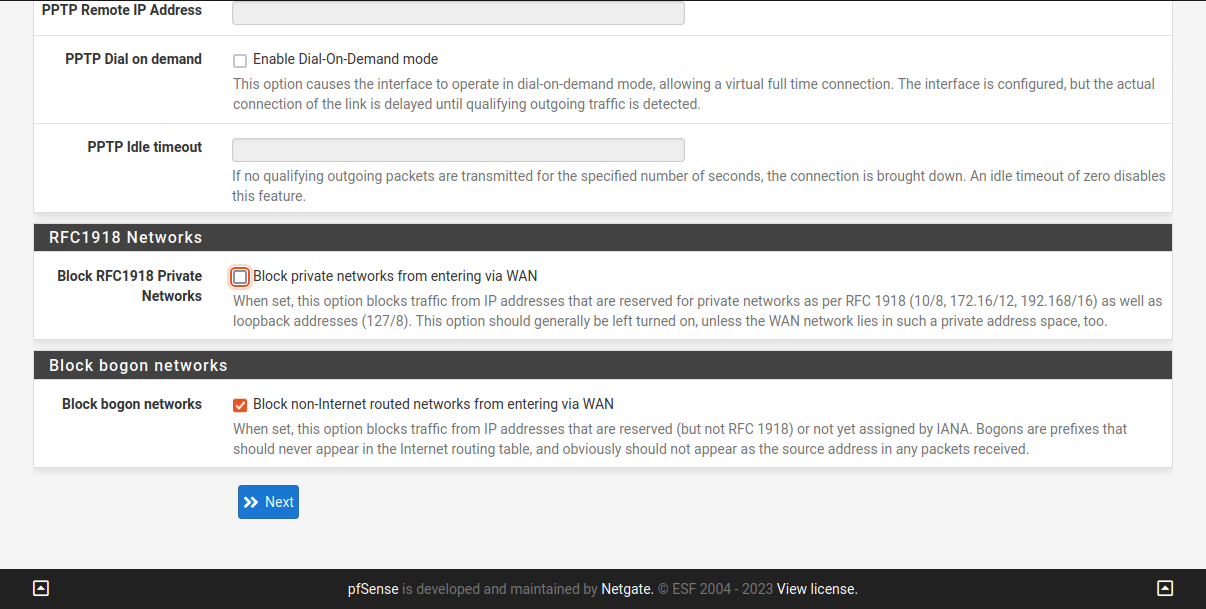
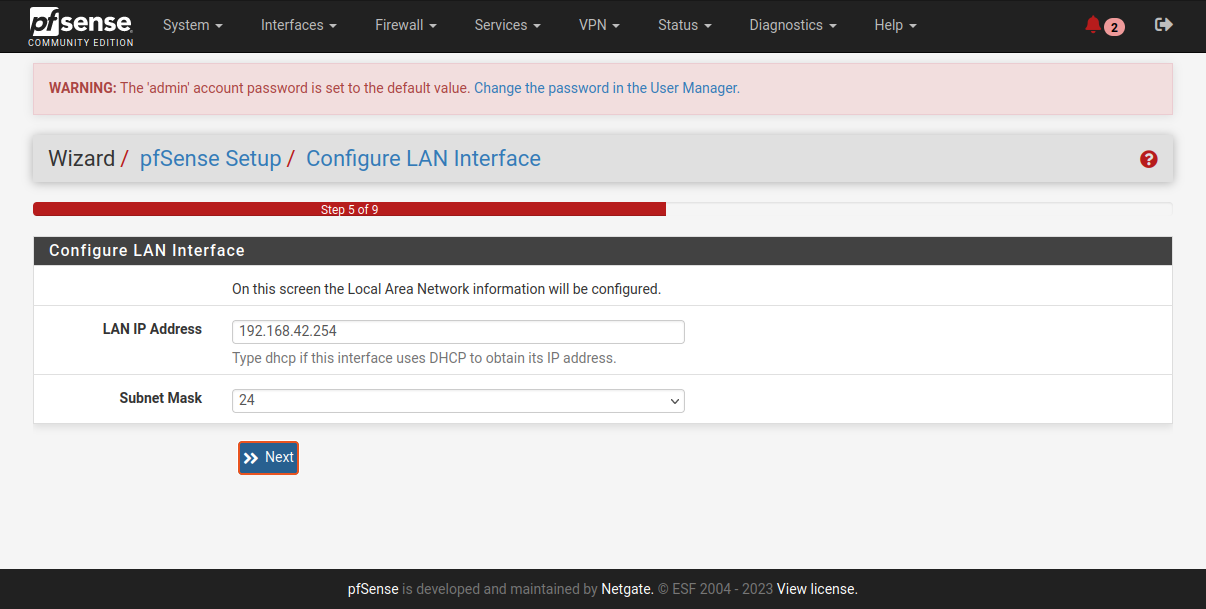
| Configuración inicial de pfSense |
|---|
 |
 |
 |
 |
 |
 |
 |
 |
 |
 |
 |
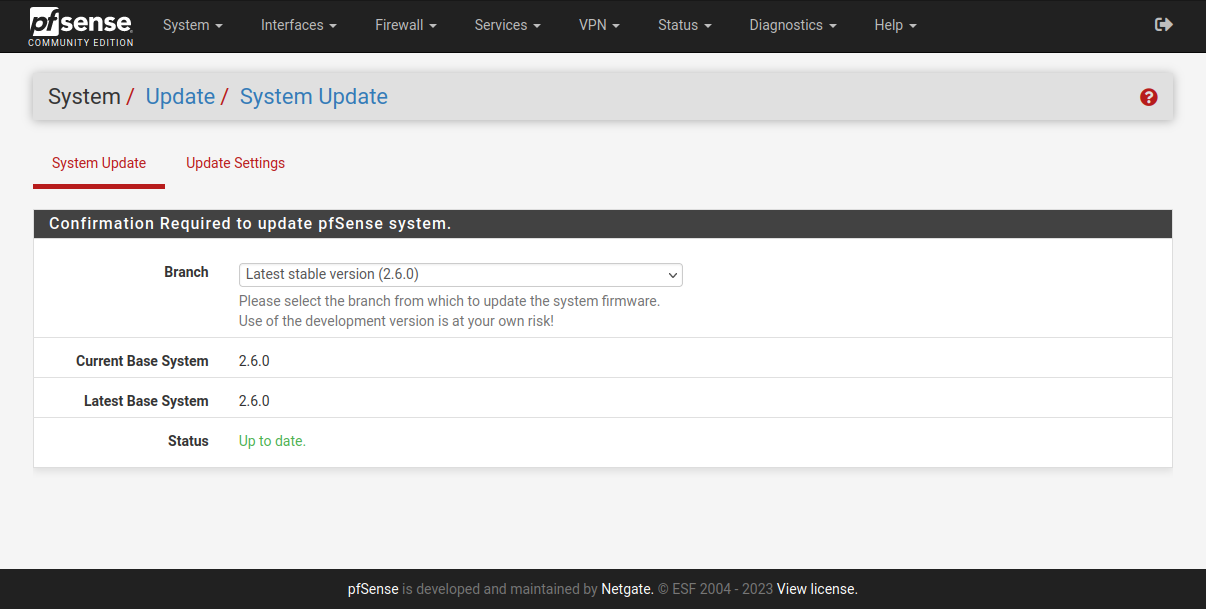
Verificar actualizaciones#
| Verificación de actualizaciones |
|---|
 |
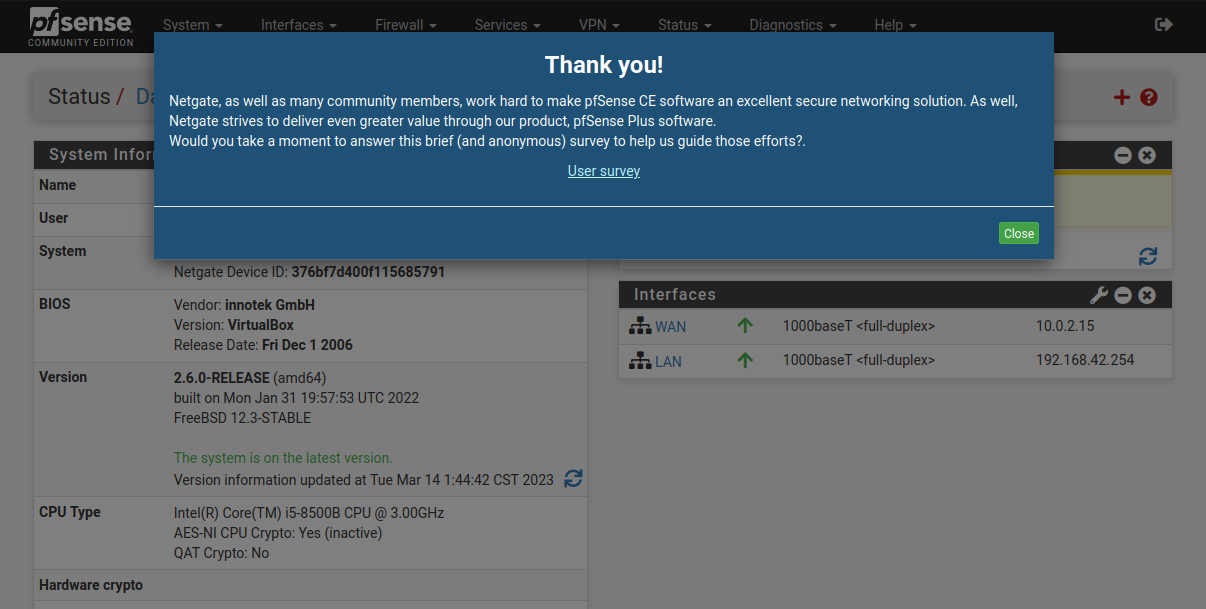
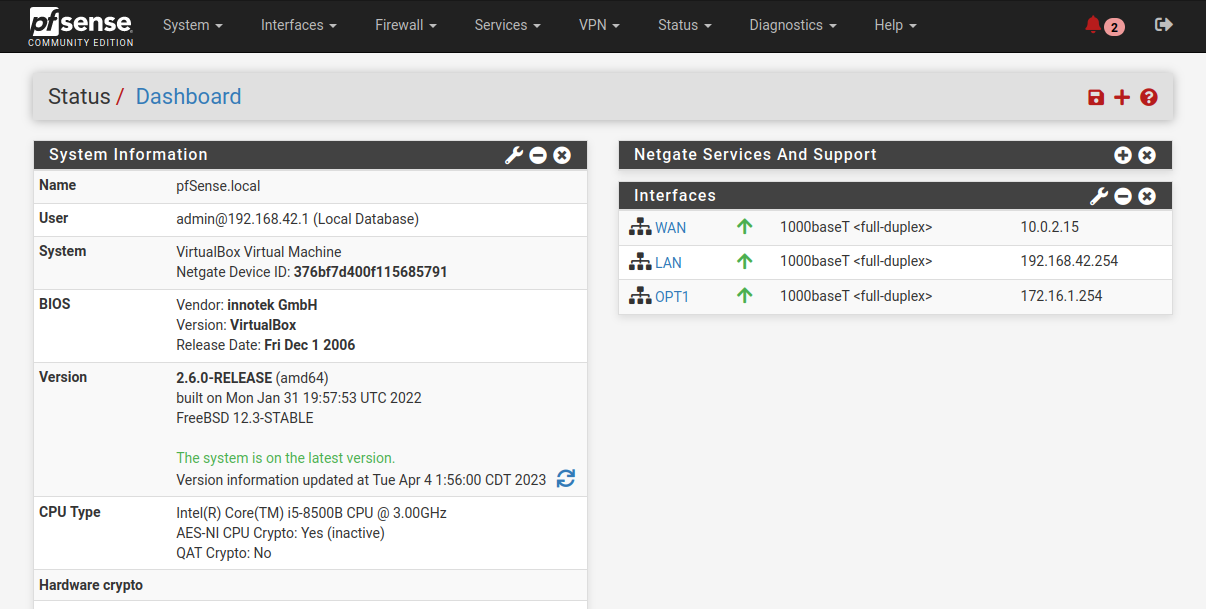
Dashboard principal#
| Dashboard de pfSense |
|---|
 |
 |
Nombre de host y contraseña#
- Establecer la contraseña de administrador de pfSense como
Redes-2026-2 - Establecer el nombre de host como
pfSense-ABCD-EFGH-IJKL-MNOP-QRST.local- Donde
ABCD-EFGH-IJKL-MNOP-QRSTrepresenta el nombre del equipo que debió anotarse previamente en la lista del grupo
- Donde
Guardar configuraciíón inicial#
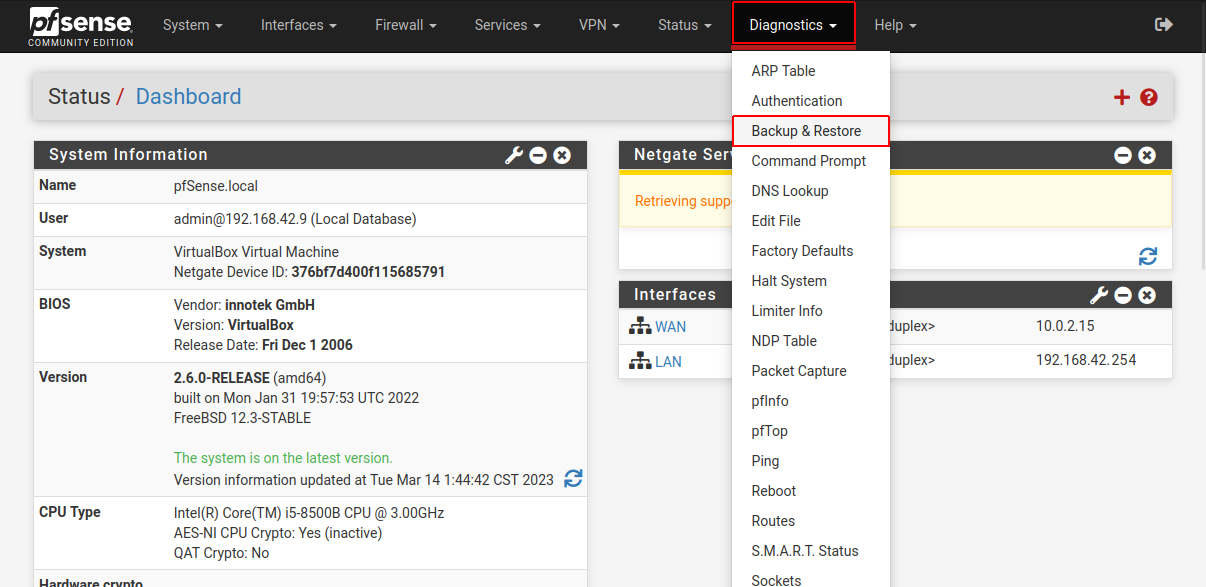
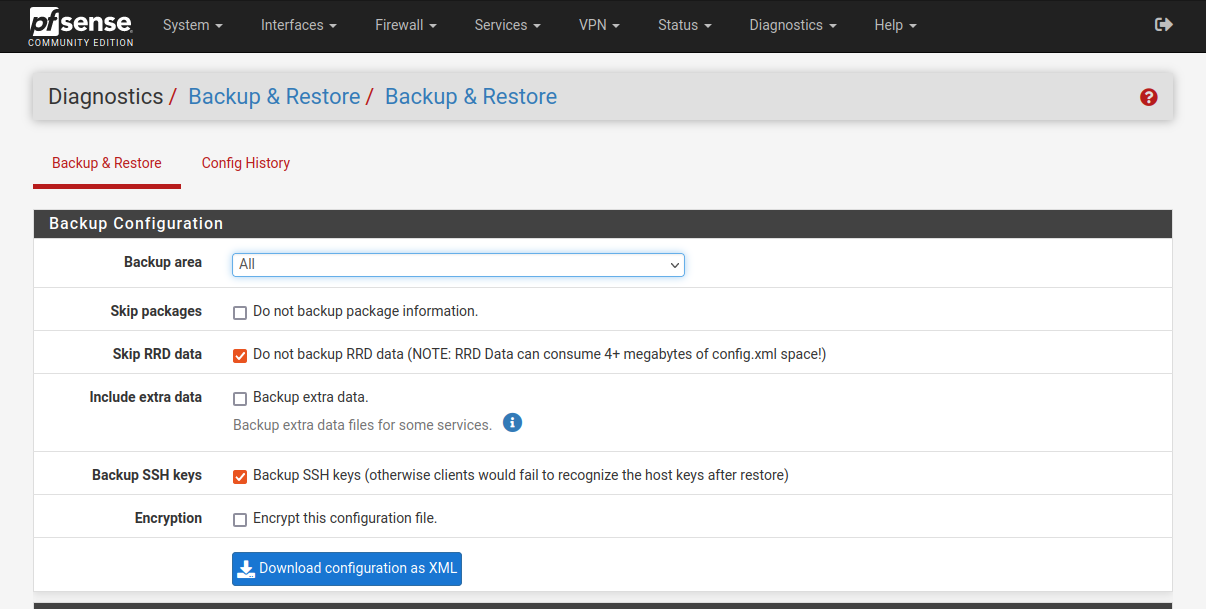
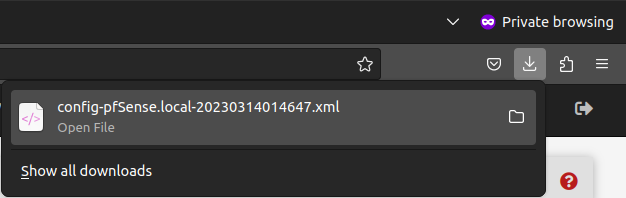
Guardar la configuración en el archivo pfsense-inicial.xml e incluirlo en la carpeta files/pfSense/
| Exportar configuración a archivo XML |
|---|
 |
 |
 |
Note
- Continúa en la siguiente página cuando tengas pfSense instalado
| ⇦ | ⇧ | ⇨ |
|---|---|---|
| Página anterior | Arriba | Página siguiente |